Getting started with Uniwell Lynx is easy. This guide is designed to provide a brief overview that will help you to get up and running quickly. A number of important concepts will also be explained giving you a better understanding of how the software works. Links are provided throughout the guide to further, more detailed tutorials.
Installing Uniwell Lynx
The Uniwell Lynx installer is typical for a Windows application. The installer can be downloaded directly from the Lynx Software website.
- Go to the Downloads page of the Lynx Software website: https://lynxsoft.net/downloads/
- From this page click the Download Installer button for your licenced version of the software
- You will then be prompted as to what you wish to do with the file. We recommend that you save the installer (ULvX.exe) onto your PC rather than running it directly from the website. It is also recommended that you close any other programs and disable any anti-virus software before running the installer.
User Guide – The Uniwell Lynx User Guide is included as a PDF document when the software is installed. To access the user guide, go to Windows Start Menu > All Apps > Lynx Software > Uniwell Lynx vX User Guide.
Help File – Uniwell Lynx also includes a help file which can be accessed from the Help menu within the software. Context sensitive help can be accessed within the software by pressing the F1 key.
Licencing Uniwell Lynx
Uniwell Lynx software is typically protected by Electronic Licence Activation (ELA). Some older licences use a USB licence key.
The first time you run Uniwell Lynx you will be prompted to choose your Licence Type: Electronic Licence Activation, USB Licence Key or Auto-Detect.
If you have an ELA licence then you will then be prompted to activate your licence using the Licence ID and Password supplied with the software. Activation can only be done online via the internet.
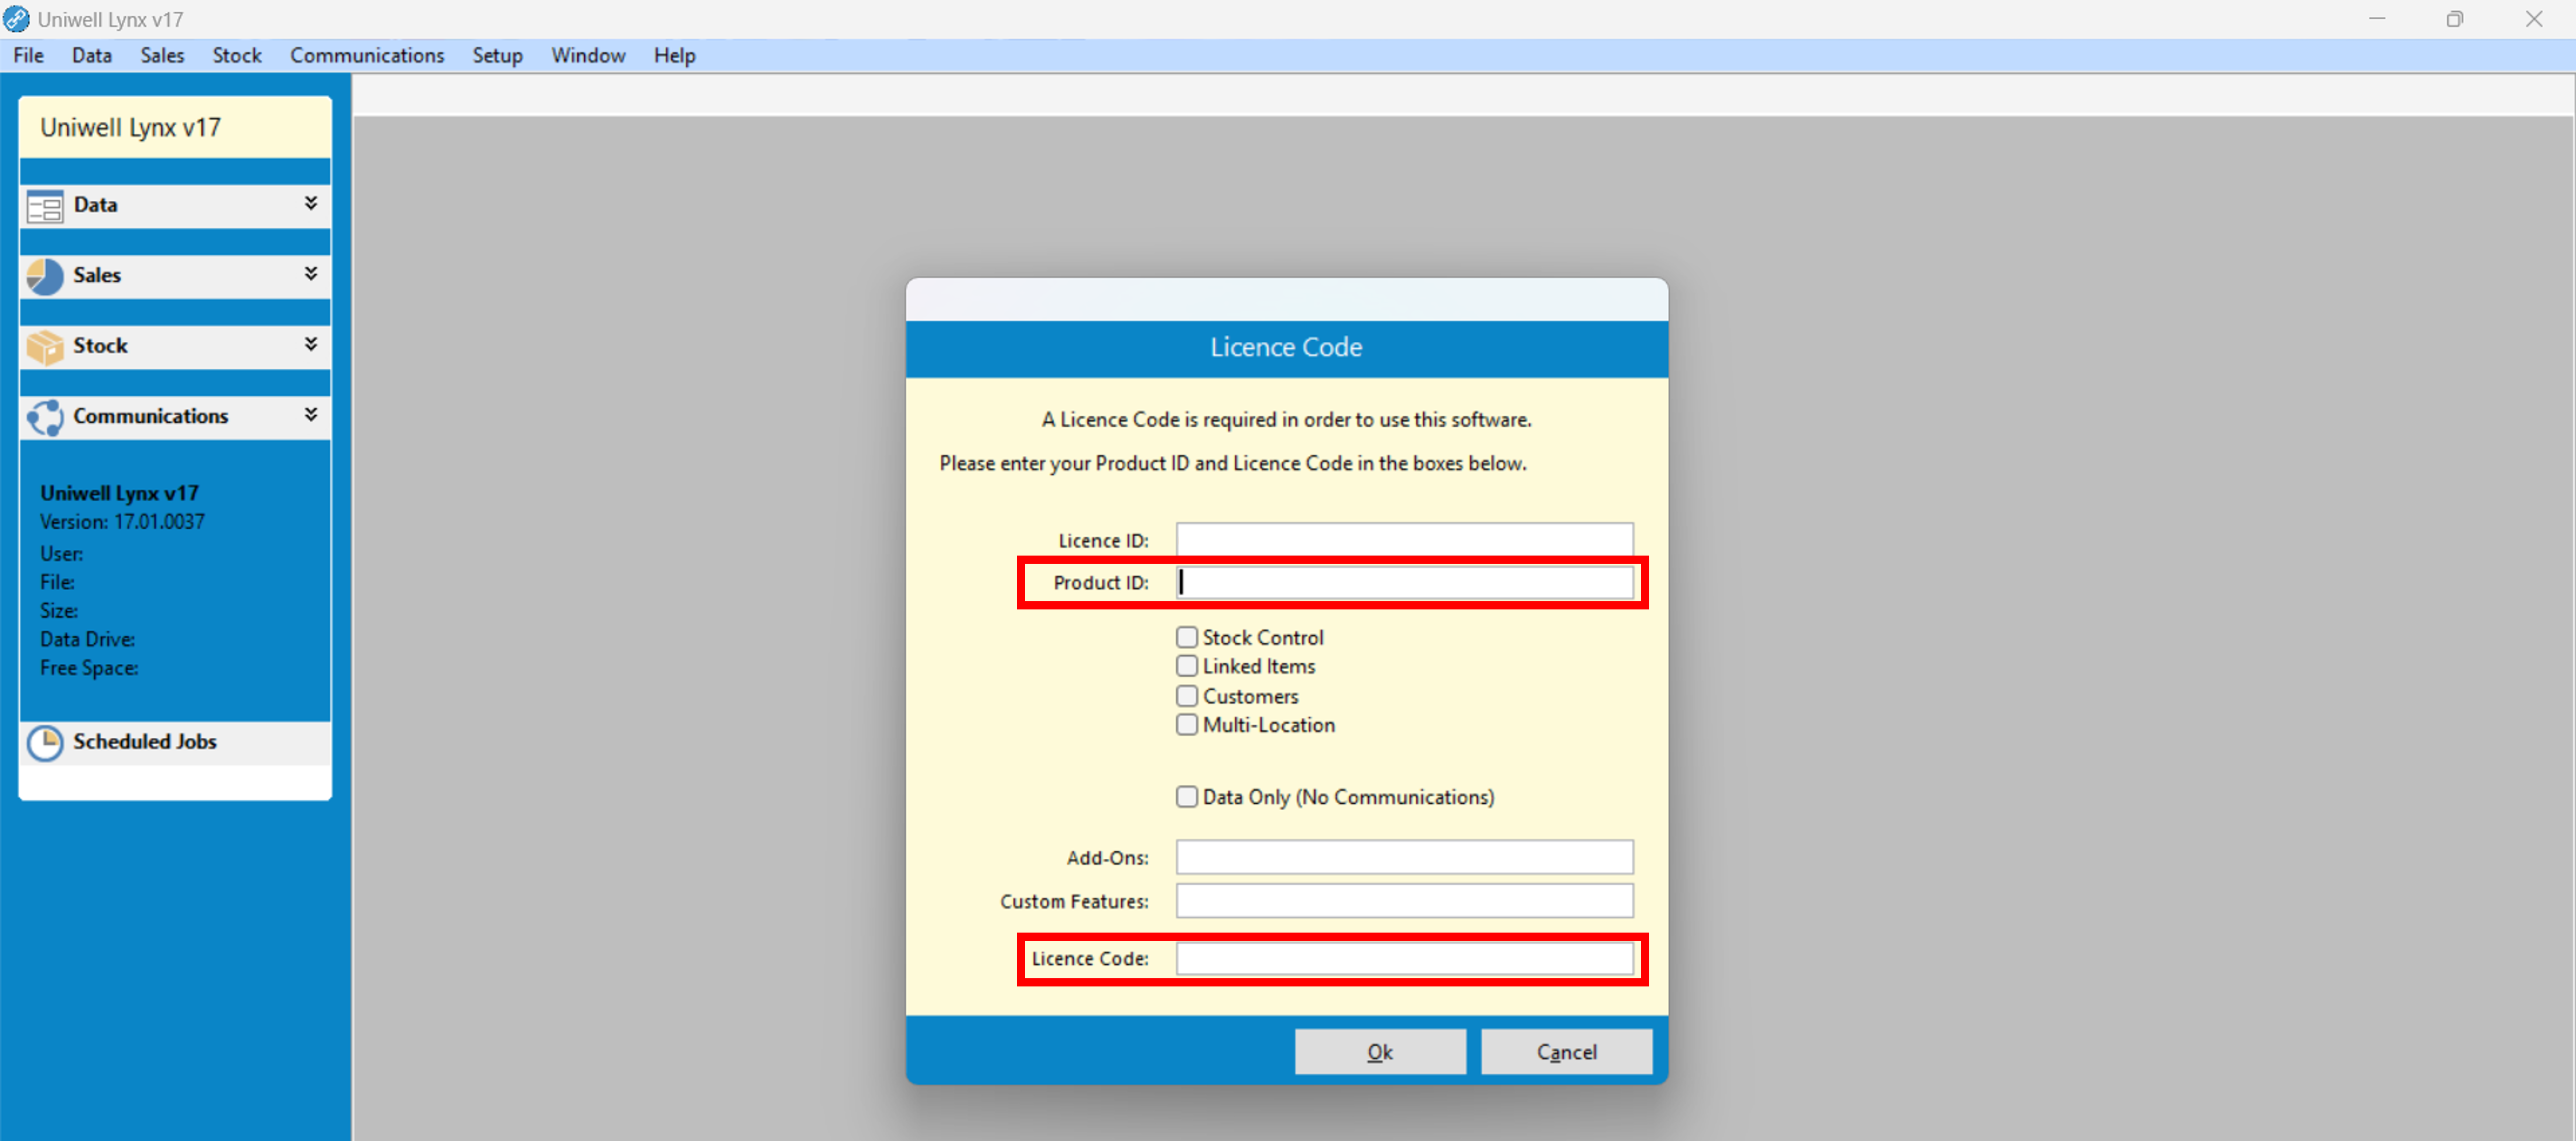
The first time you open or create a data file in Uniwell Lynx you will be prompted to enter the Product ID and Licence Code that was supplied with the software.
Further Tutorials:
Initial Setup of Uniwell Lynx
The following provides information on some of the data that can be entered as part of the initial setup. Some of these must be completed before other software features are used in order for the software to function correctly.
Initial Setup – Creating a Data File
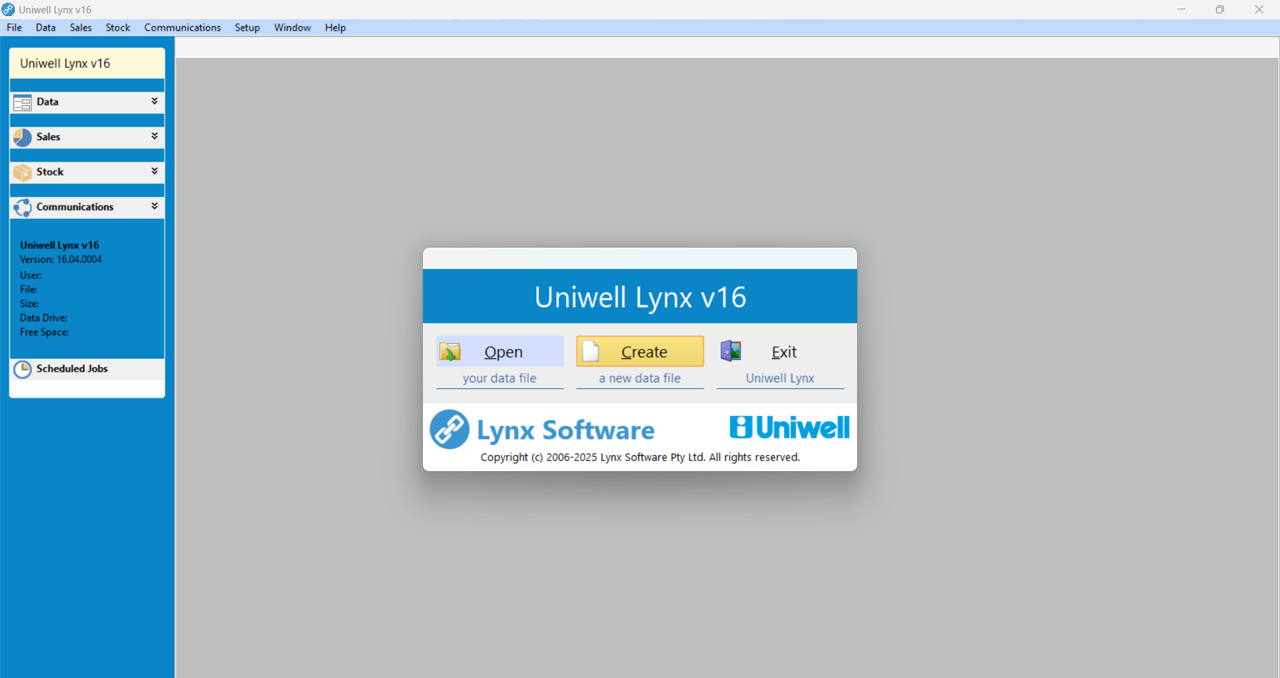
The first step in using Uniwell Lynx is to create a data file.
- Open Uniwell Lynx
- From the Welcome screen select Create a new data file
- A Save As dialog box will then be displayed, allowing you to give your new data file a meaningful filename and choose where it will be stored.
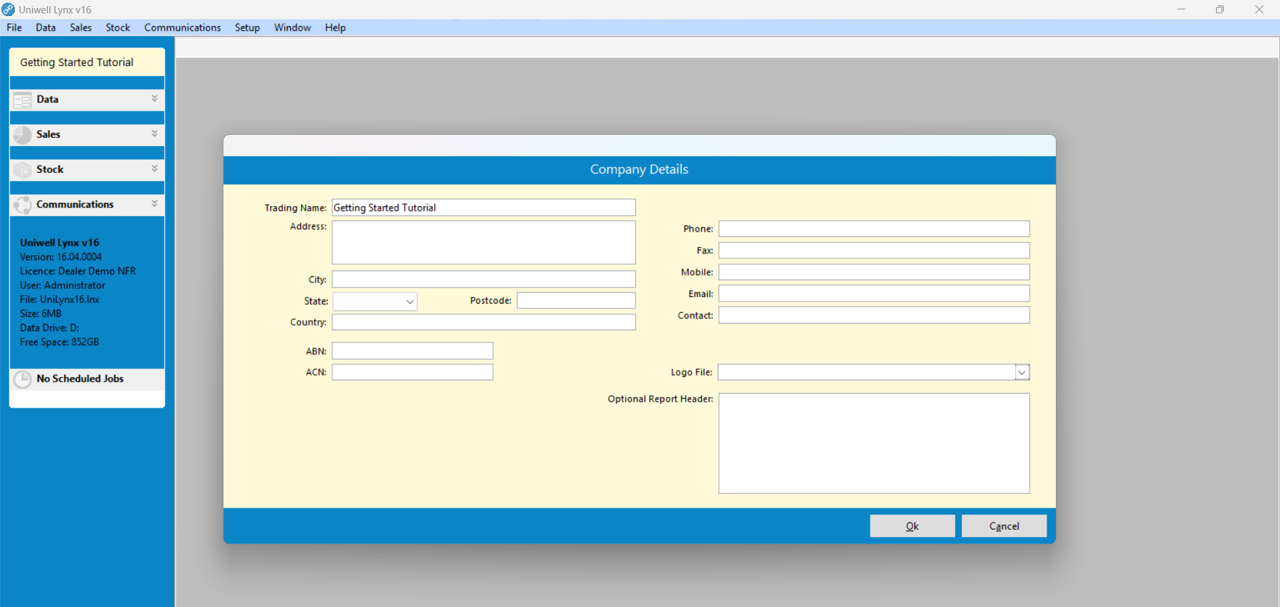
Initial Setup – Company Details
After creating a new data file, the software will prompt you to enter your Company Details. The ‘Trading Name’ will be displayed on reports within the software.
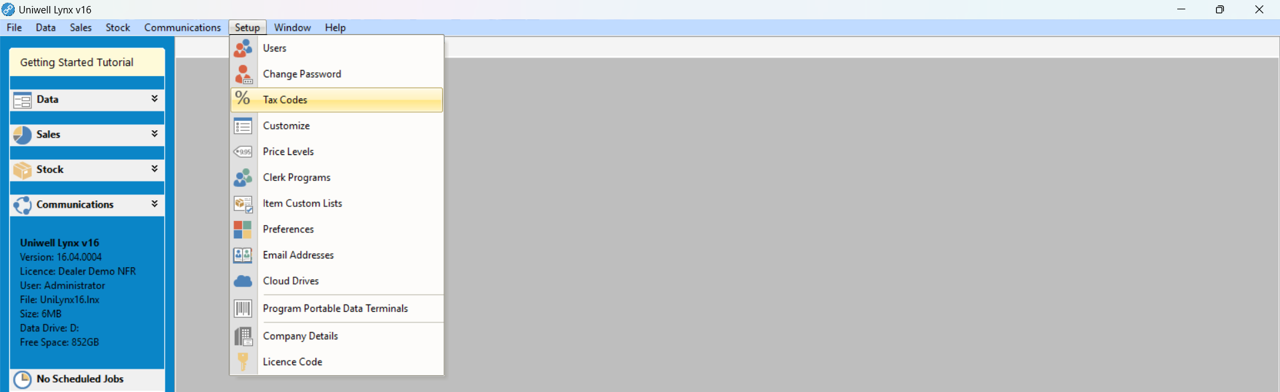
Initial Setup – Tax Codes
It is important to setup the Tax Codes correctly as the software will use the specified tax rates when calculating tax and profit amounts. For help in setting up Tax Codes, please see our further tutorial Correct Configuration of Tax Settings.
To view the Tax Codes screen, go to the Setup menu and select Tax Codes.
Initial Setup – Users
Uniwell Lynx allows unique logins to be created for each user and appropriate access permissions put in place. To view the Users screen, go to the Setup menu and select Users.
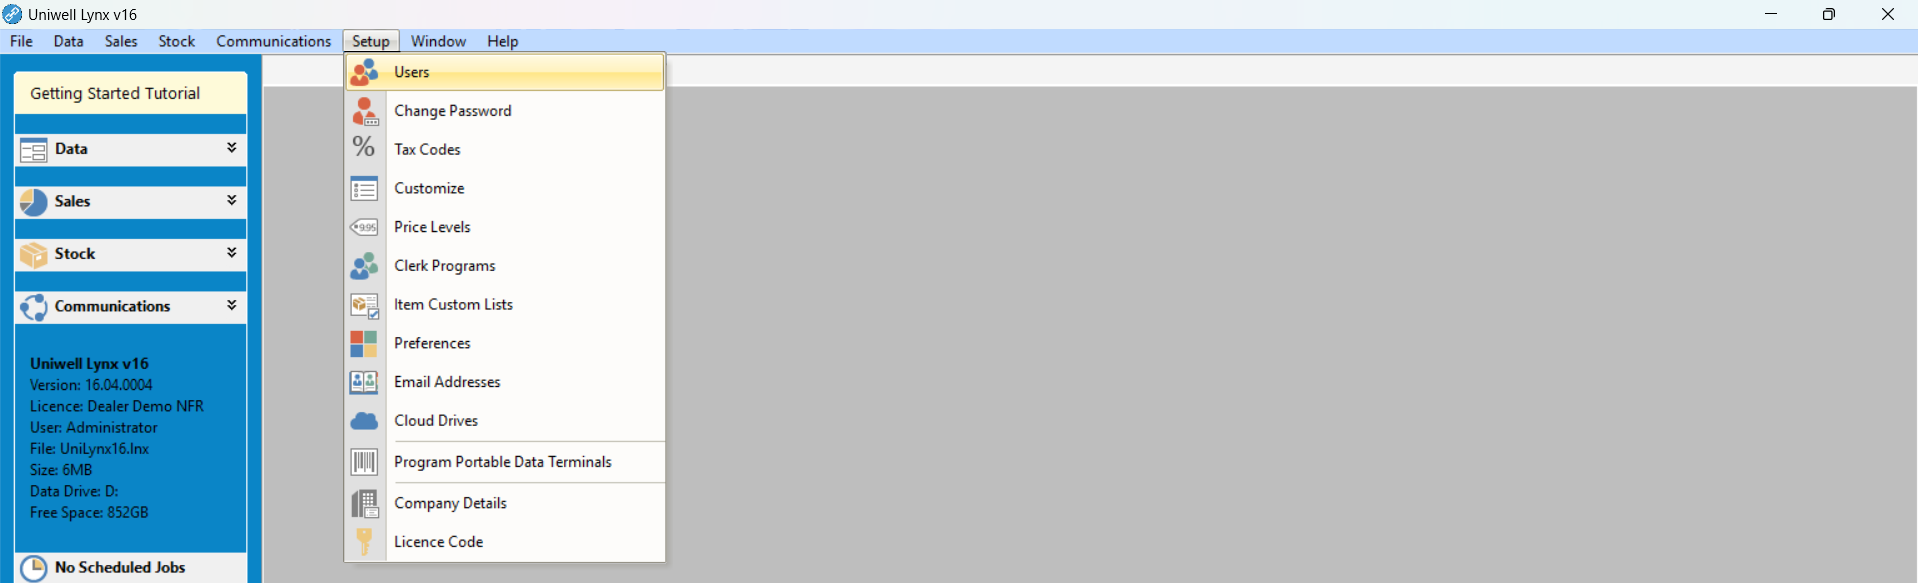
For help in creating users, please see our further tutorial Creating New Users and Setting Up User Security
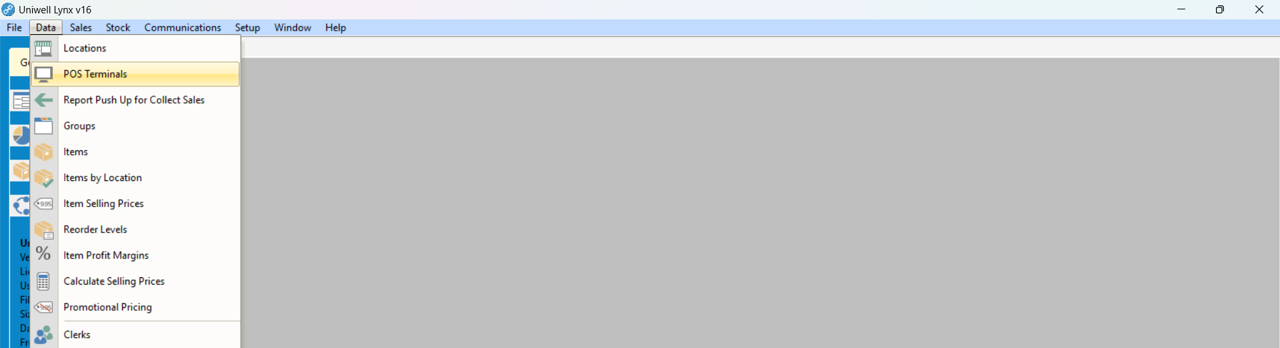
Initial Setup – POS Terminals
Uniwell Lynx allows you to setup multiple Uniwell POS terminals for use with the software. To enable the POS terminal/s and software to ‘talk’, settings in both must be correctly setup. For help in doing this, please see our further tutorial Configuring Your POS Terminals for Communications
To view the POS Terminals screen in Uniwell Lynx, go to the Data menu and select POS Terminals.
Initial Setup – Groups
Groups are an integral part of the programming in your POS terminals. All items (PLUs and barcodes) are linked to Groups. To access Groups, go to the Data menu and select Groups.
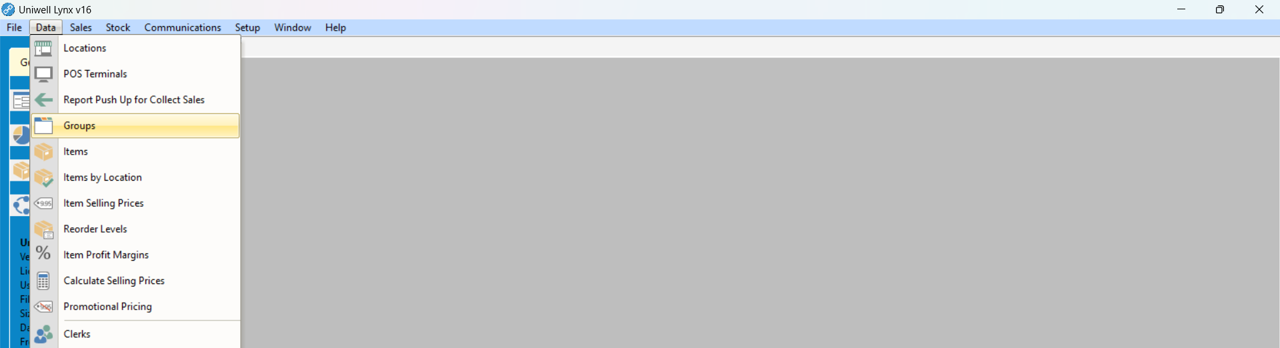
For help in setting up Groups, please see our further tutorial Modifying Groups
Initial Setup – Items
Items are the products or services you buy, sell or stock. To access Items, go to the Data menu and select Items.
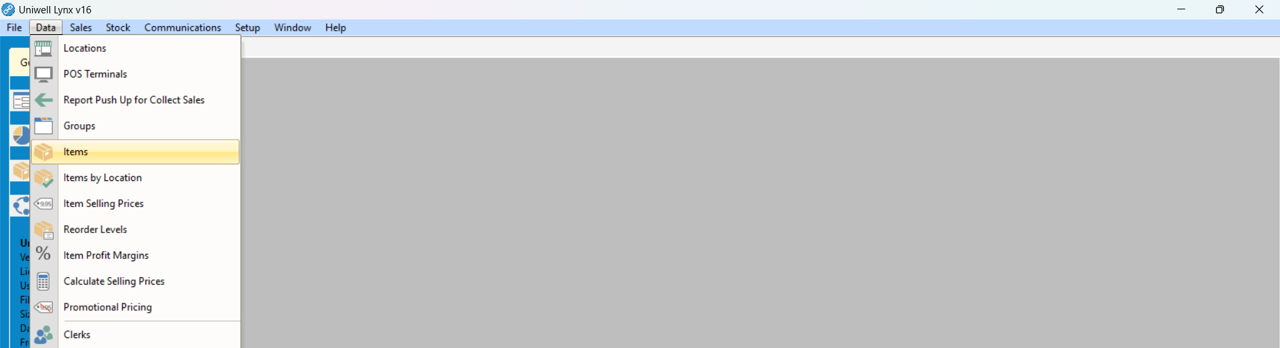
For help in setting up Items, please see our further tutorial Creating New Items
Initial Setup – Lynx Required Settings
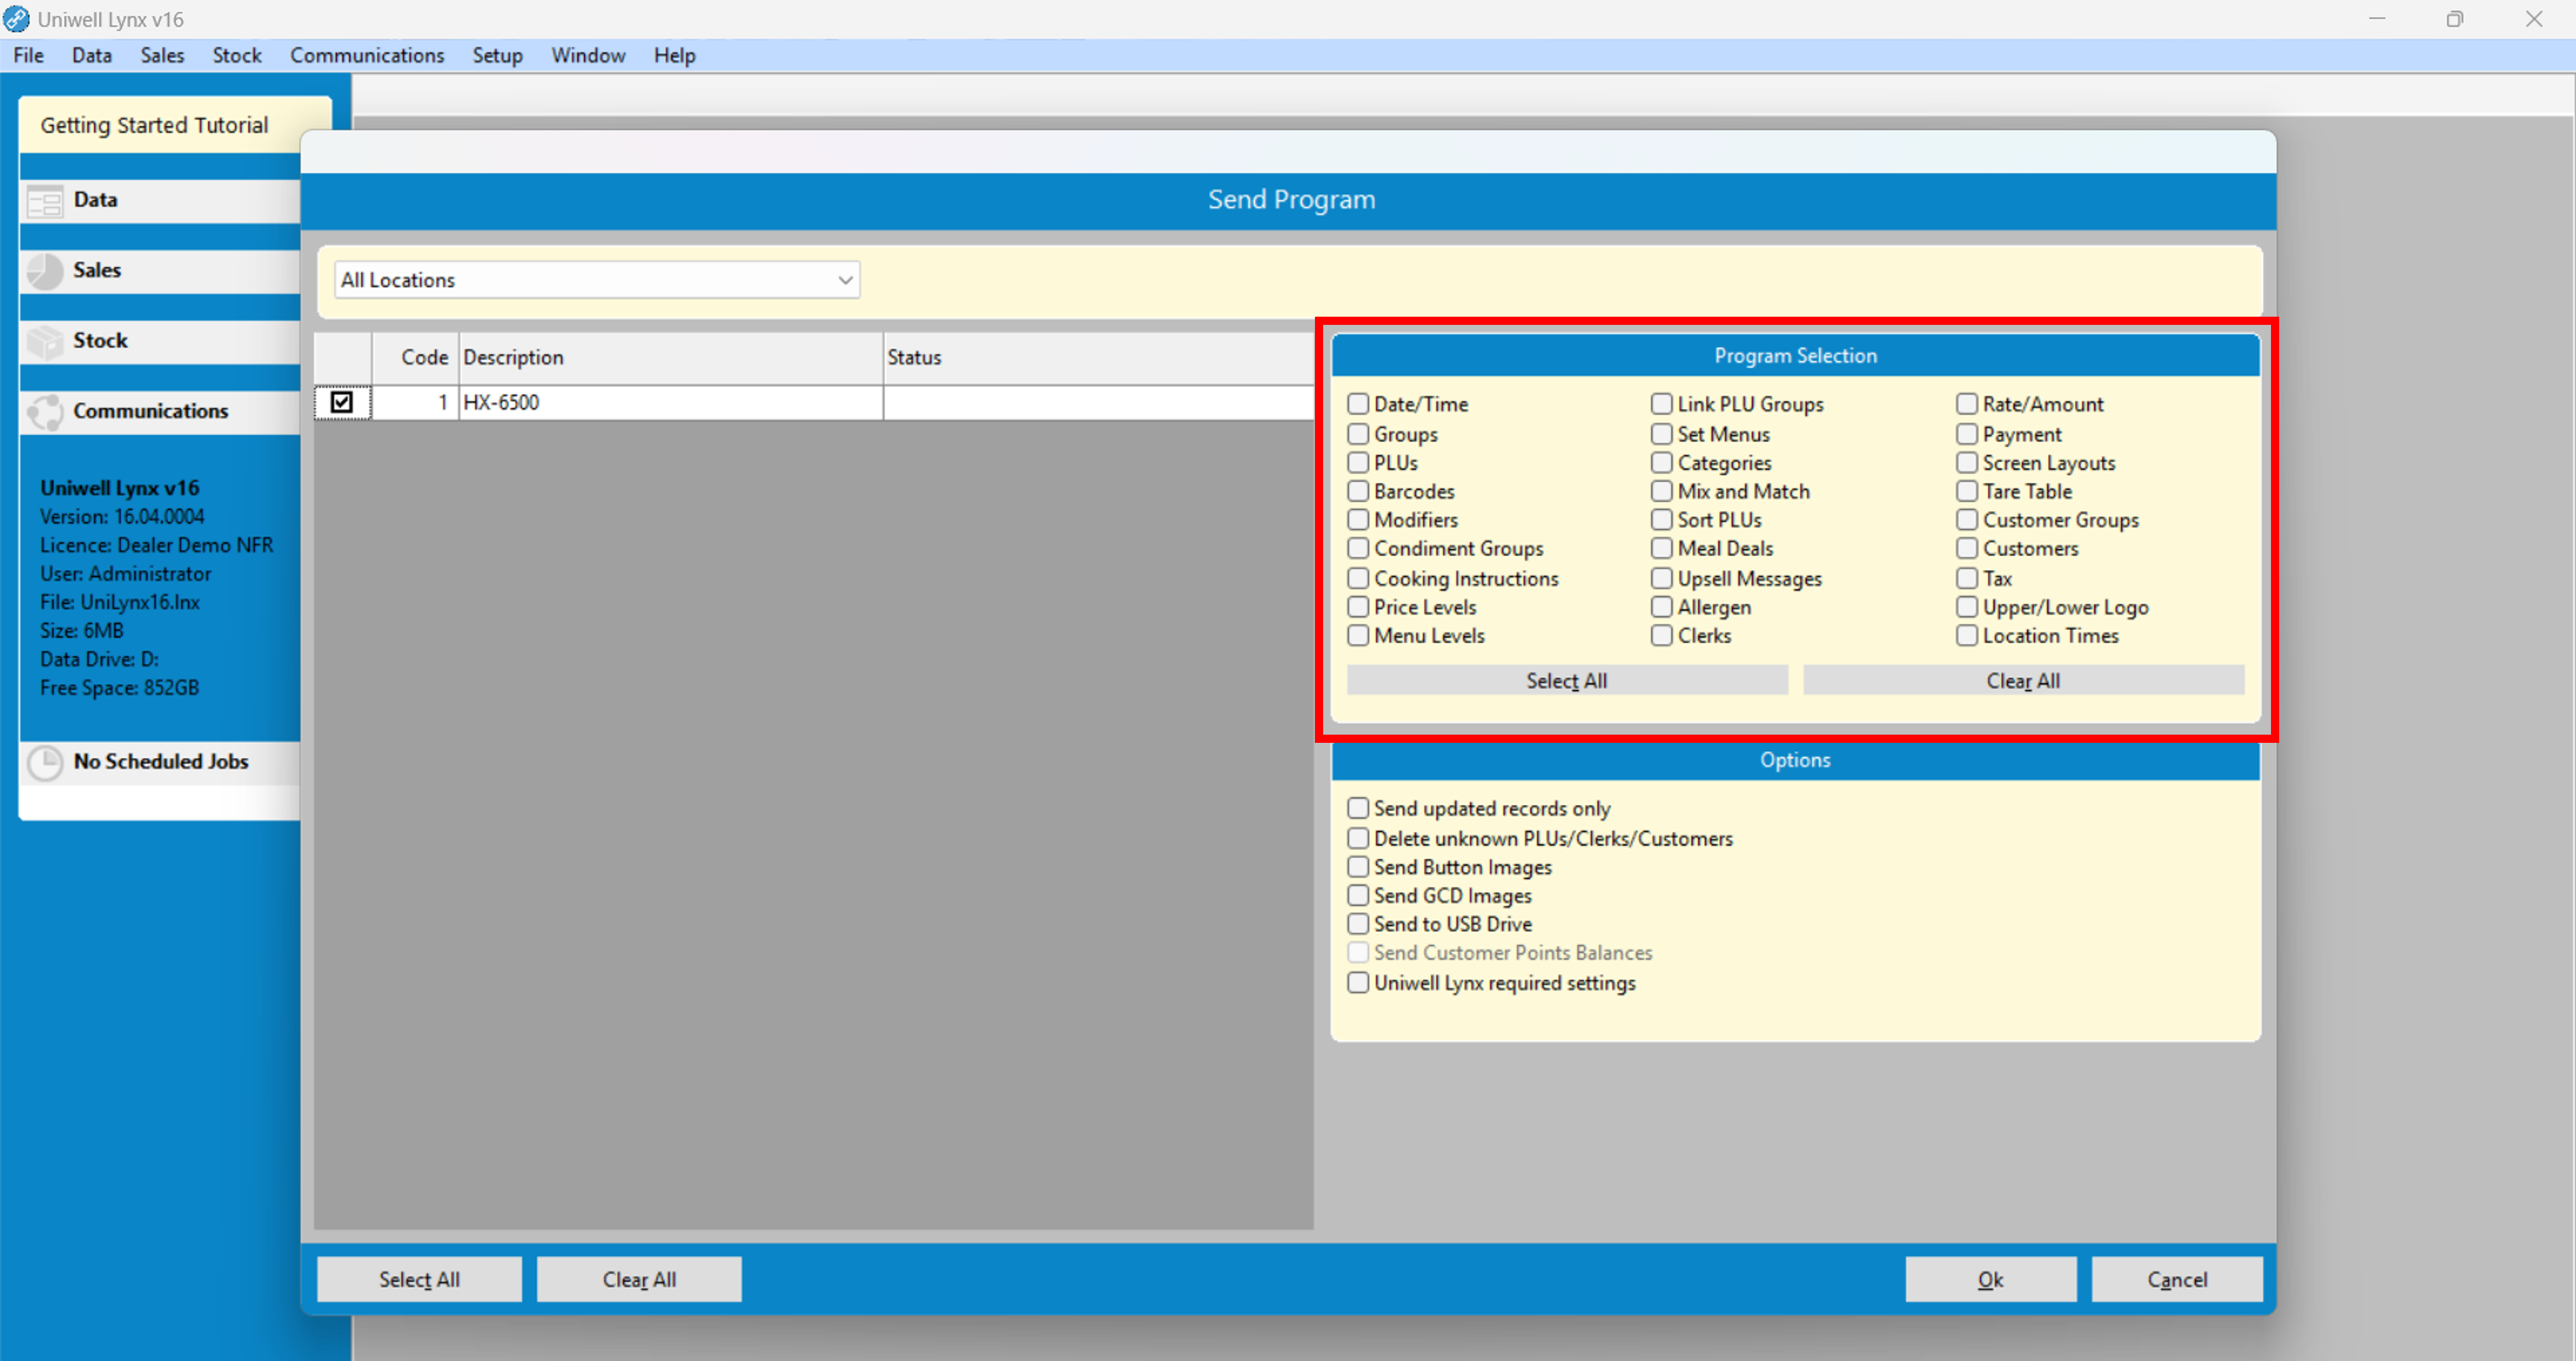
A number of settings must be setup correctly in your Uniwell POS terminal in order to work correctly with Uniwell Lynx. The Lynx Required Settings option in Send Program can be used to send the correct settings to your Uniwell POS terminal. This should be done before any sales are entered at the terminals. To do this:
- Go to the Communications menu and select Send Program

- Select the POS terminal/s to be programmed
- Tick the Uniwell Lynx required settings checkbox located under Options

- Click the Ok button to perform the Send Program
Communications Basics
In Uniwell Lynx, Communications refers to the process of transferring data to or from your POS terminals.
Communications Basics – Extract Program
If you are connecting Uniwell Lynx software to an existing POS terminal, then Extract Program can be used to import program information from the terminal into your Uniwell Lynx database. To perform an Extract Program:
- Go to the Communications menu and select Extract Program
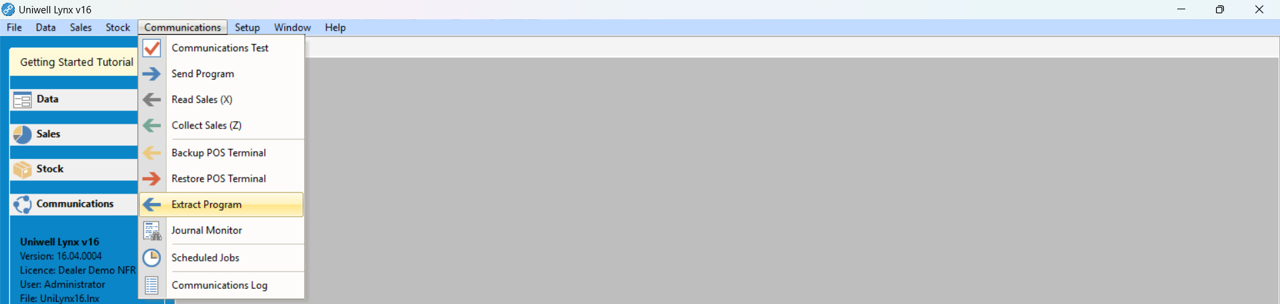
- Select the POS terminal you want to import data from
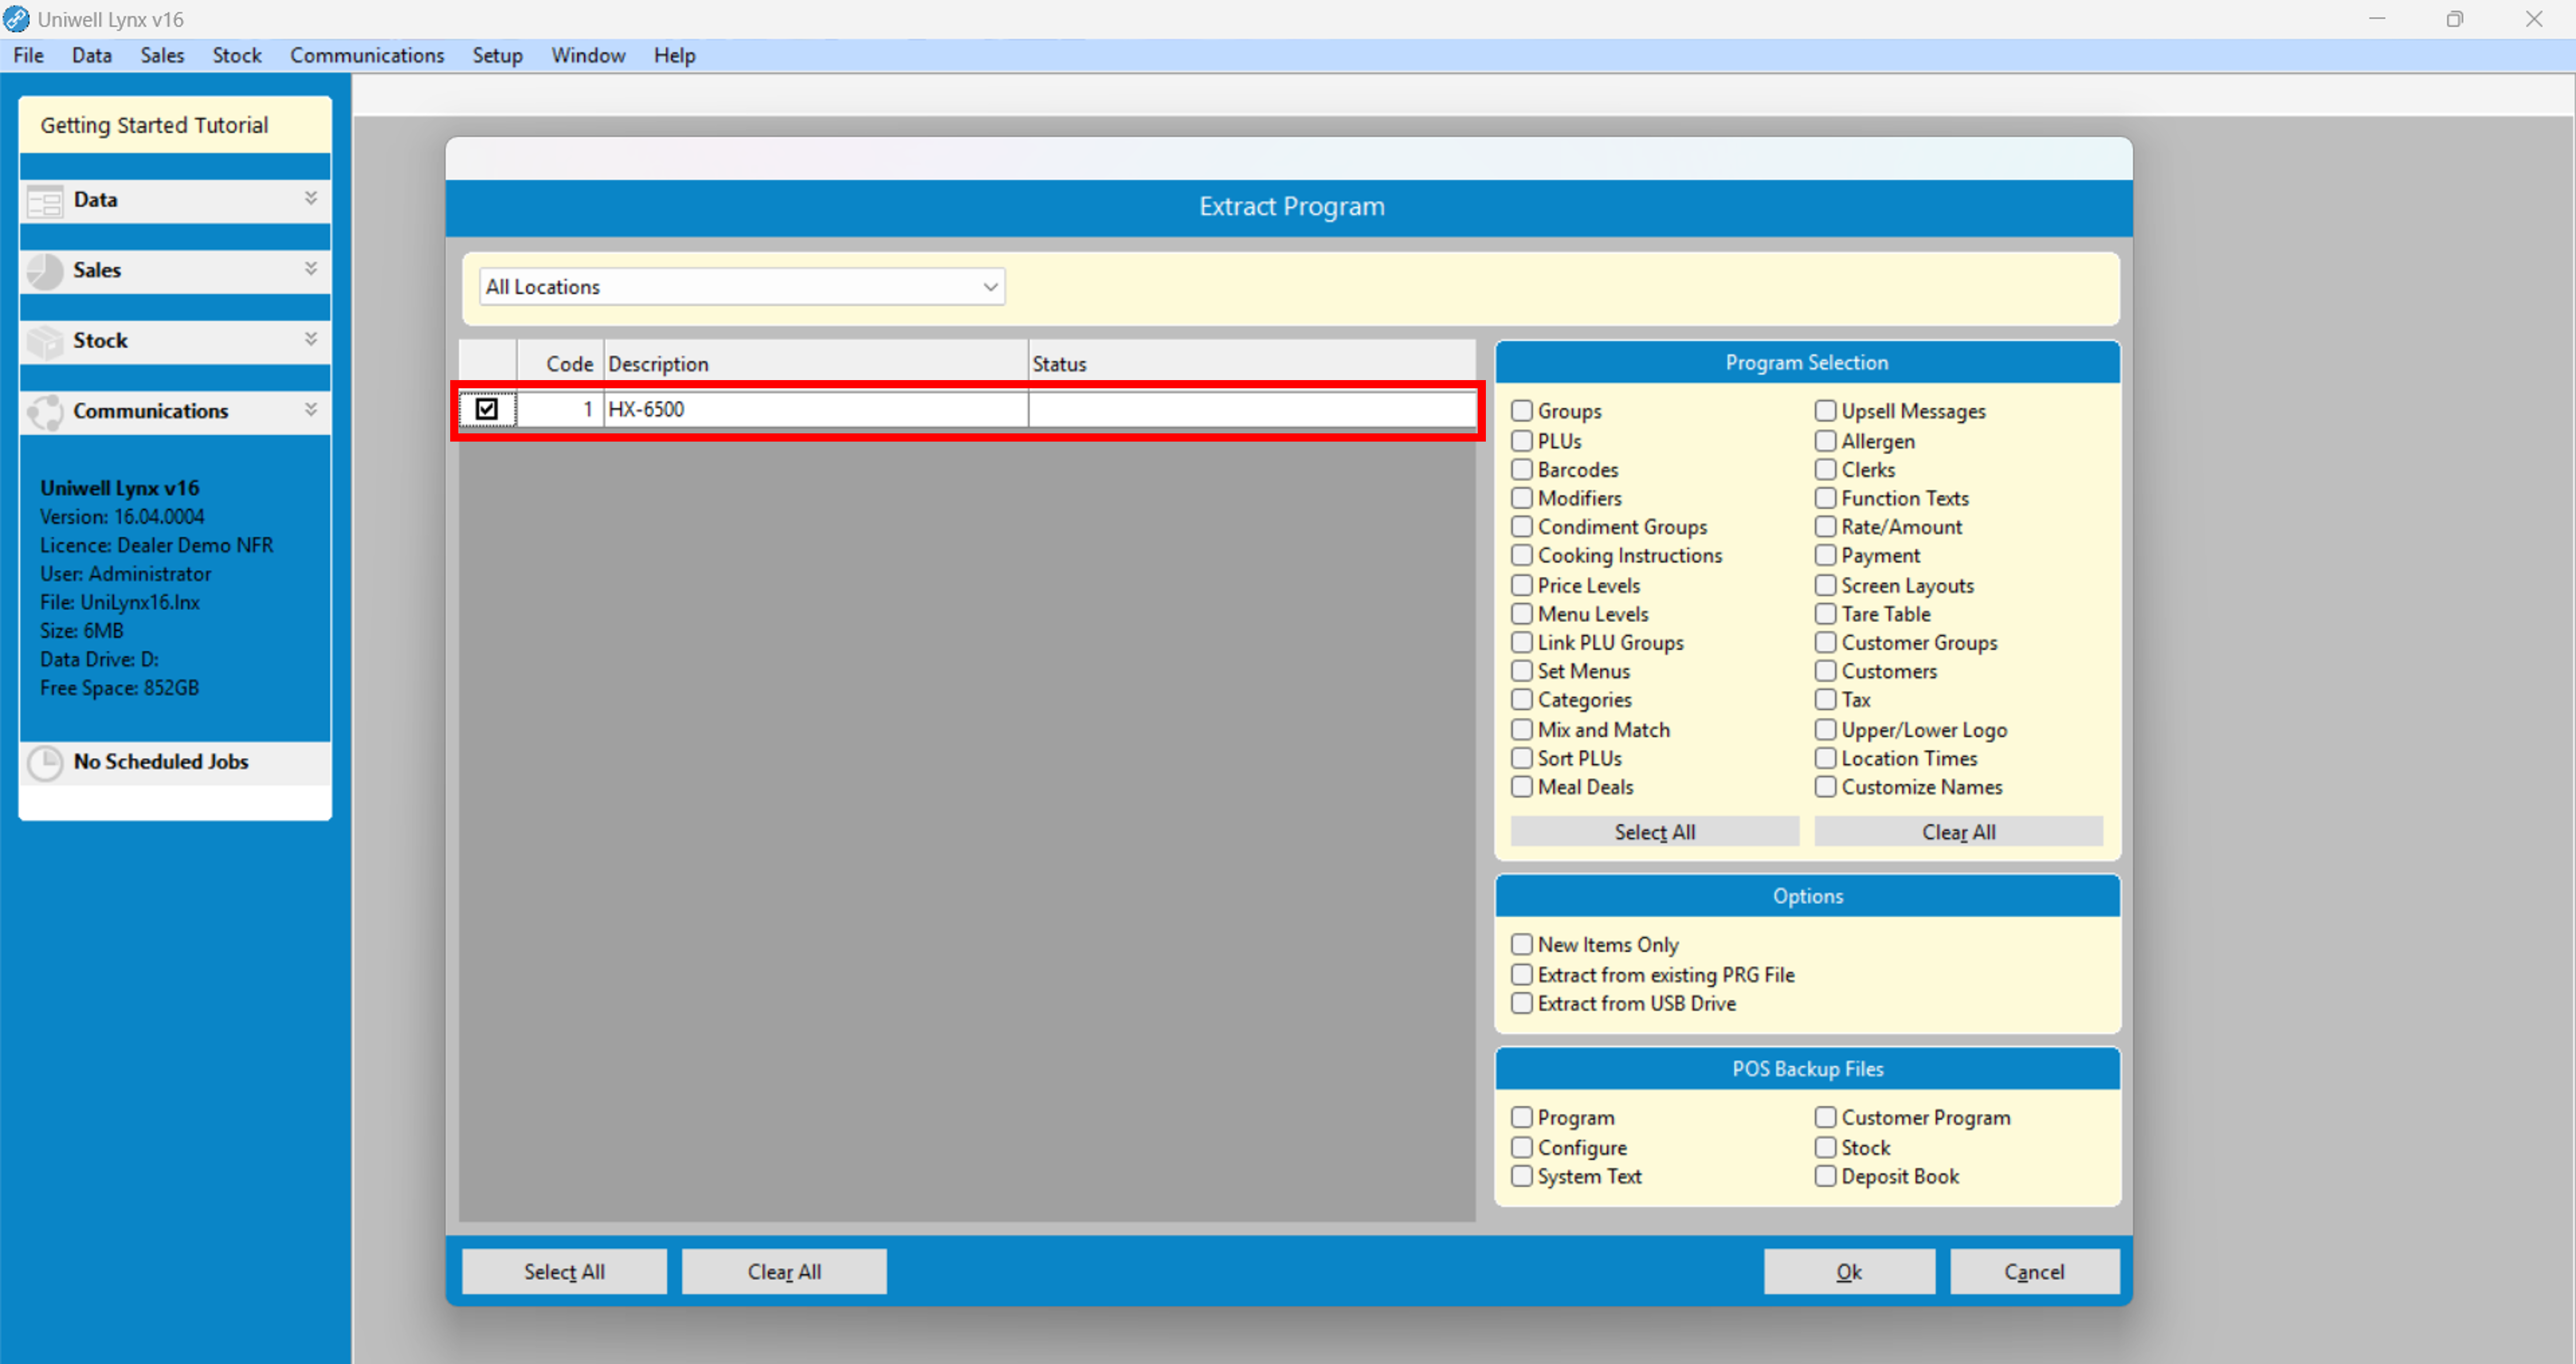
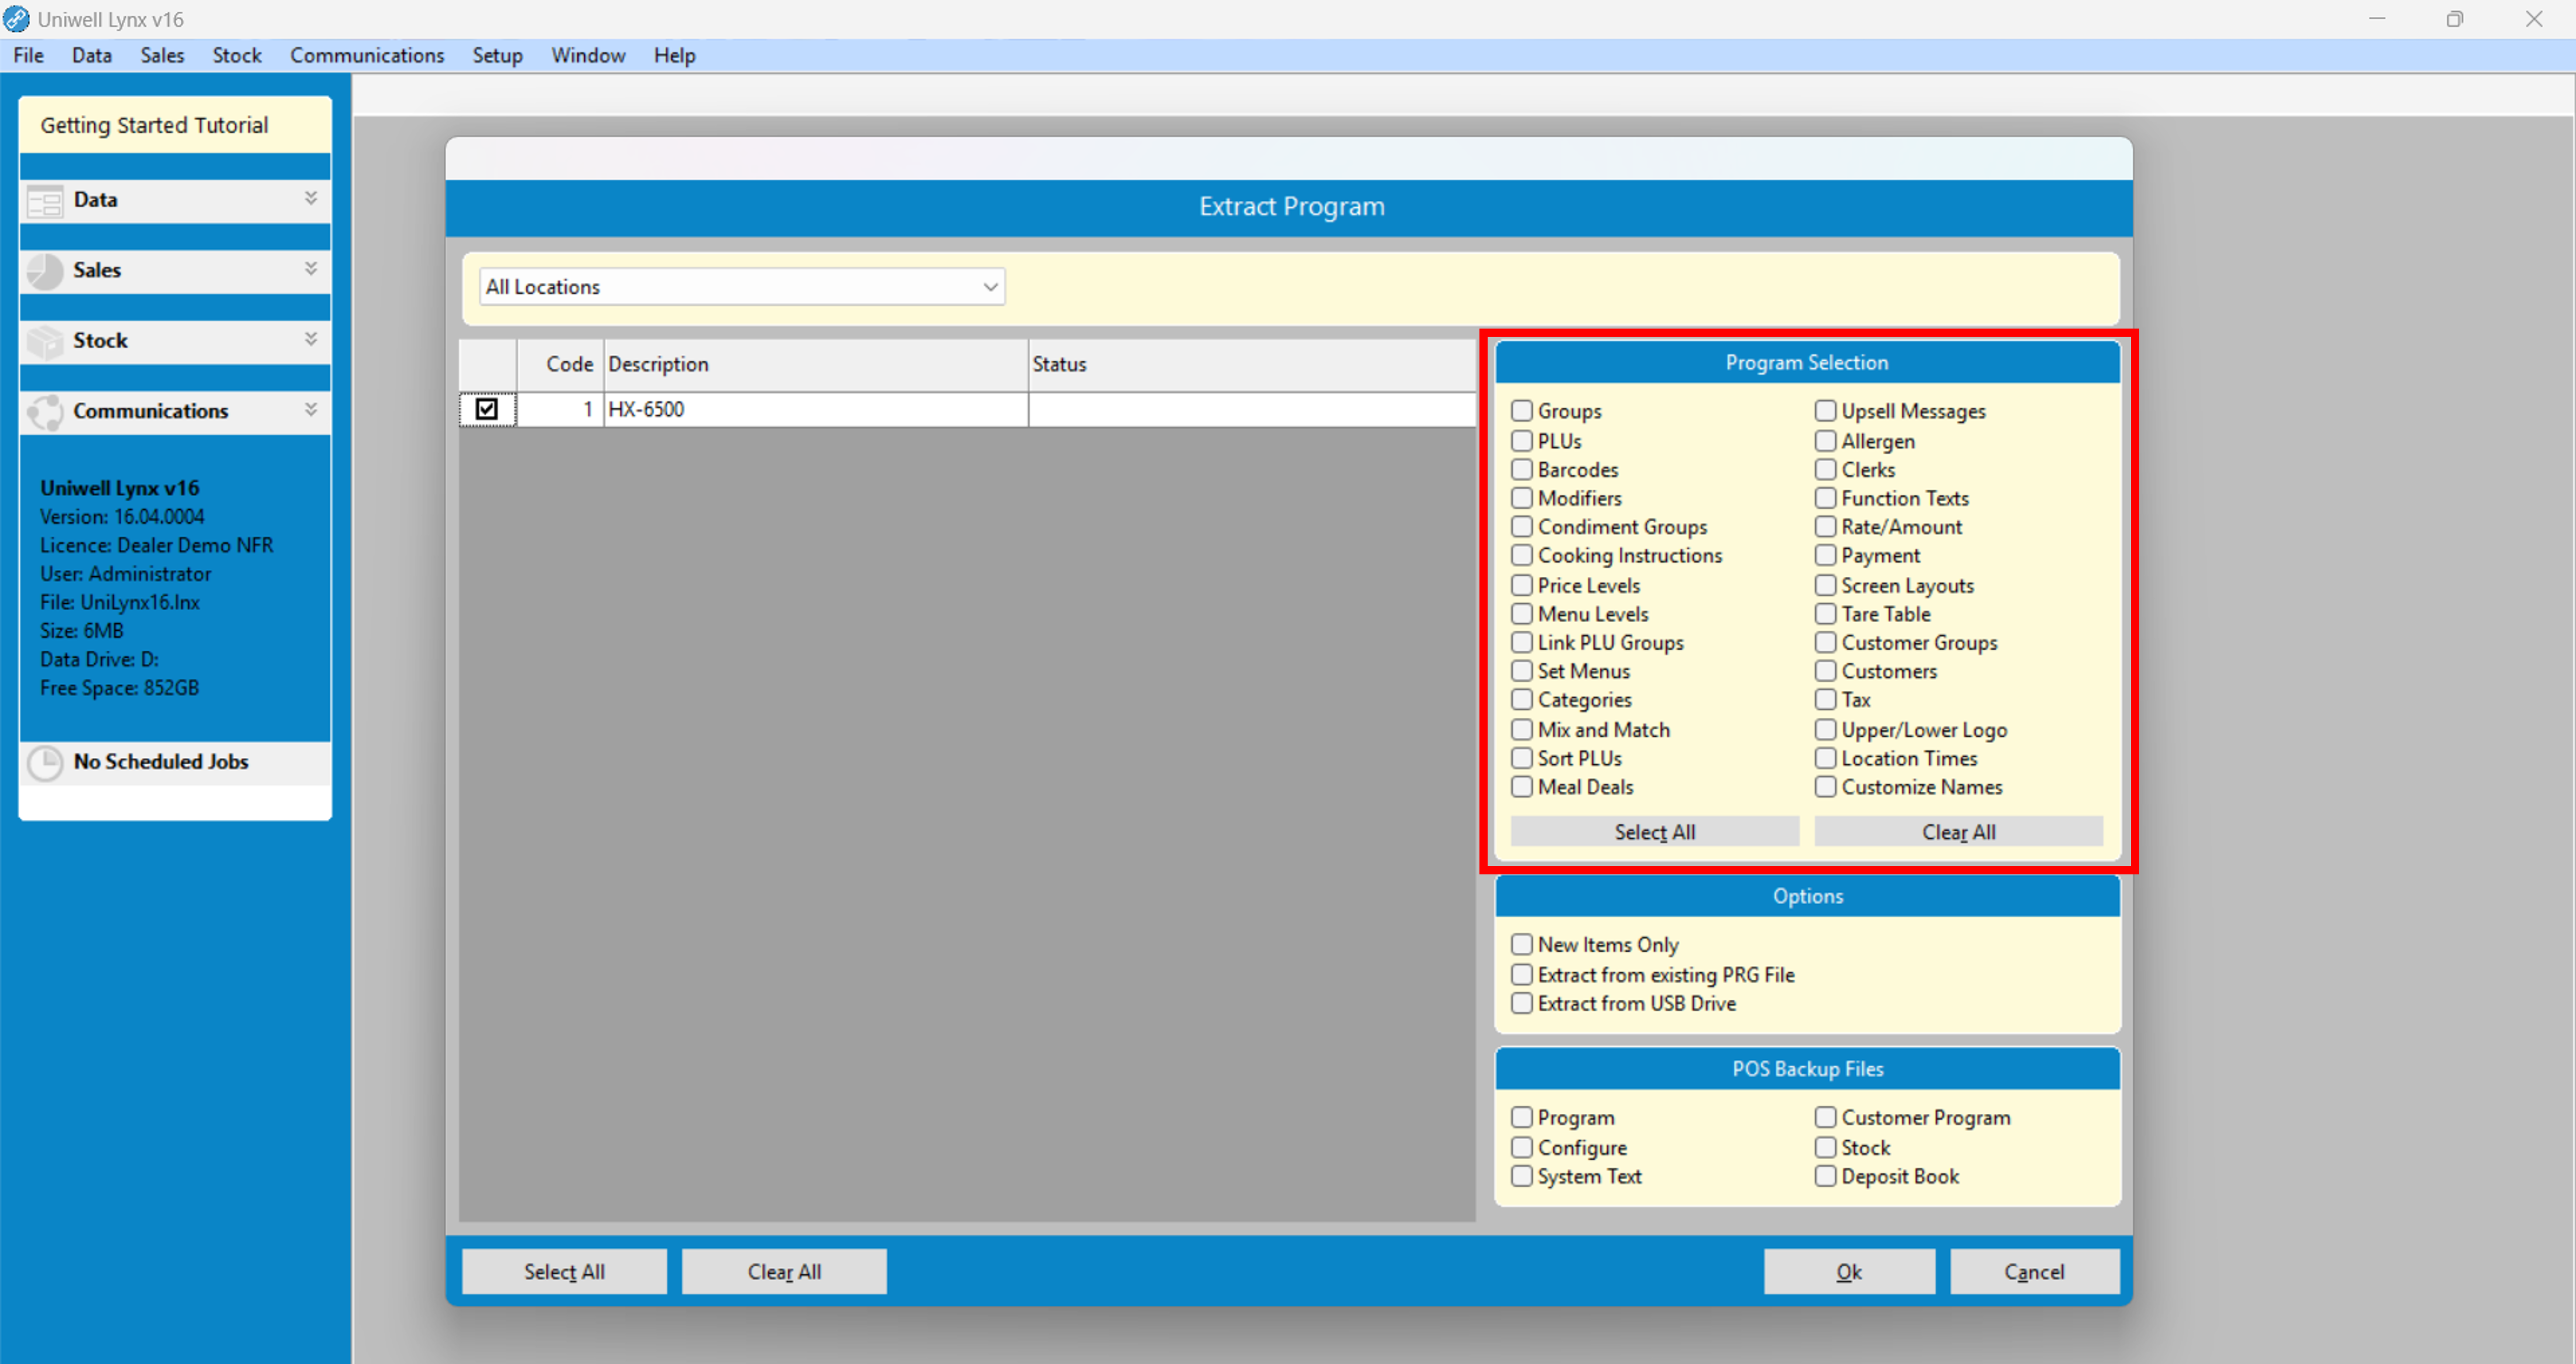
- Tick the checkboxes of the data you want to import under Program Selection
- Click the Ok button
Further Tutorial: Extract Program
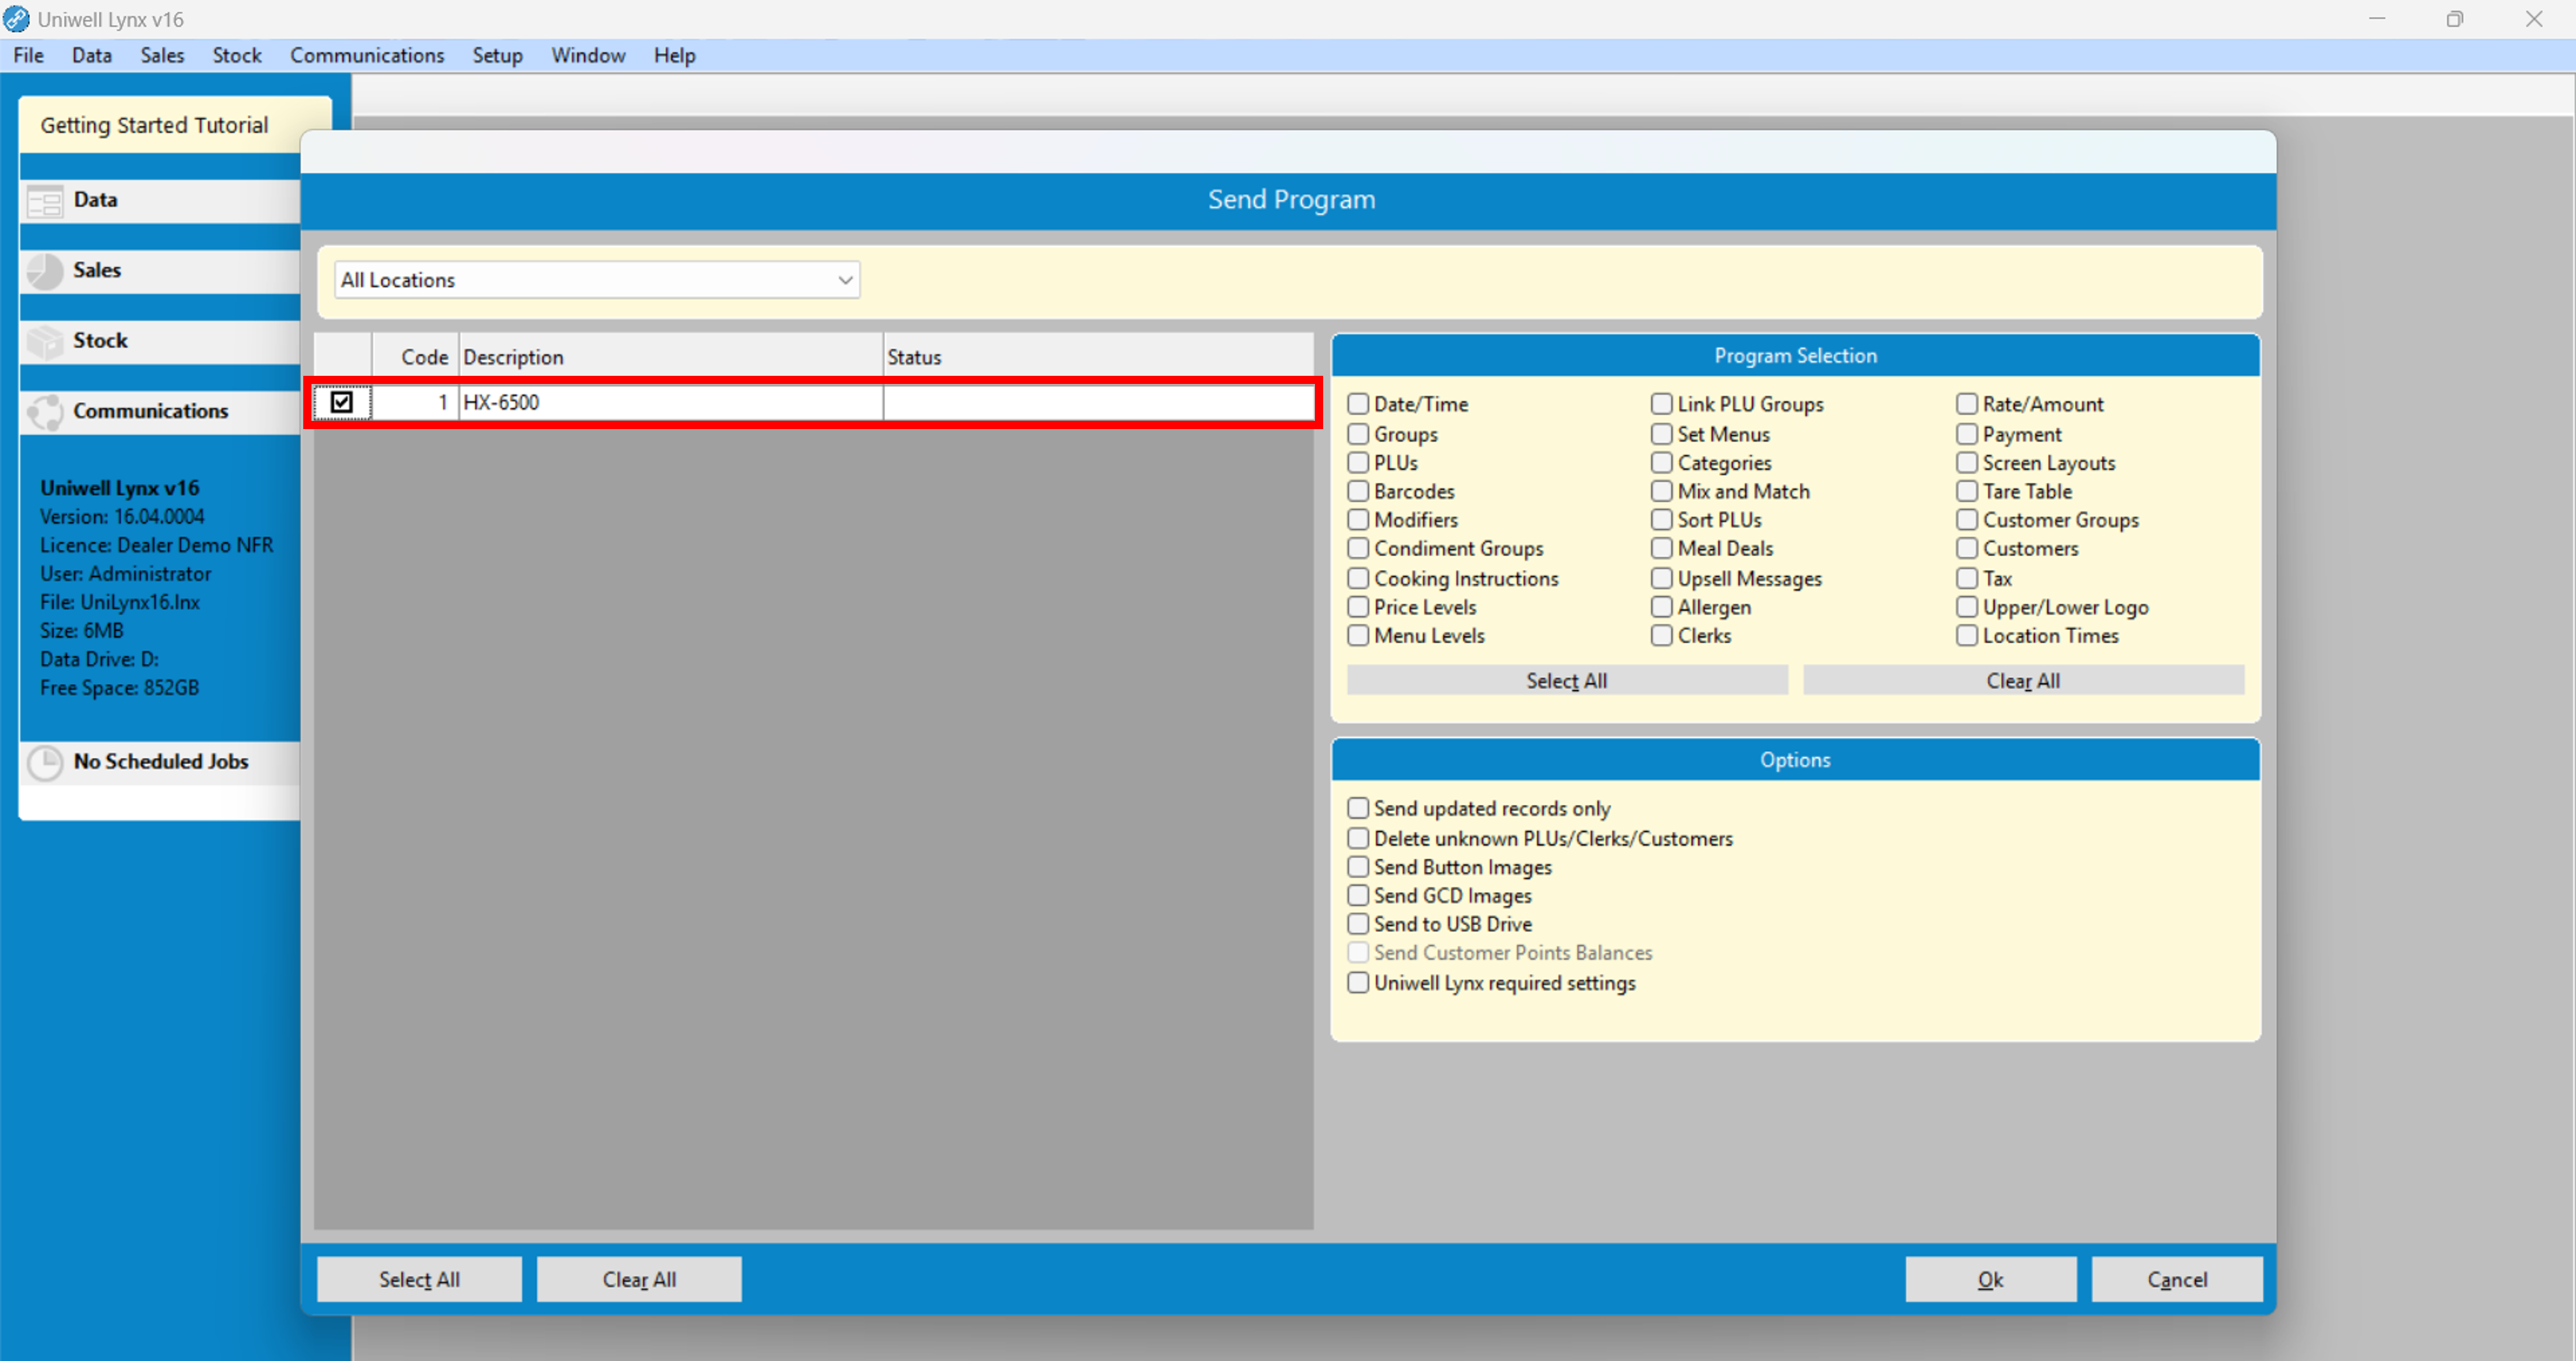
Communications Basics – Send Program
To send program data from your Uniwell Lynx database to your POS terminal:
- Go to the Communications menu and select Send Program
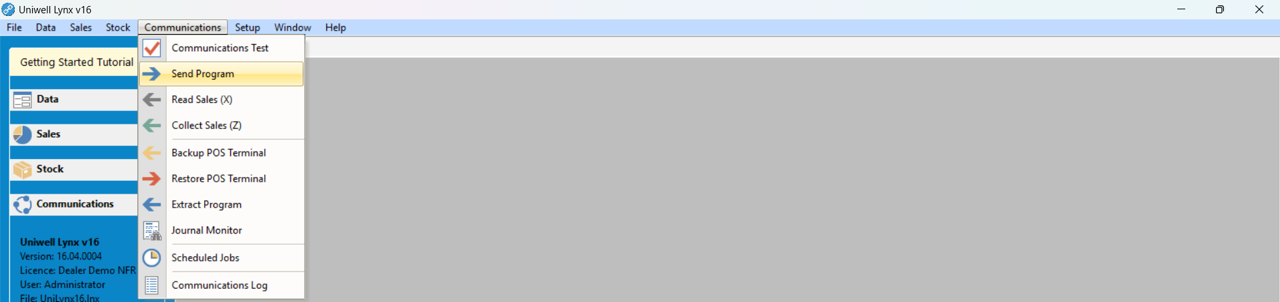
- Select the POS terminal/s you wish to send data to
- Tick the checkboxes of the data you want to send under Program Selection
- Click the Ok button
Further Tutorial: Send Program
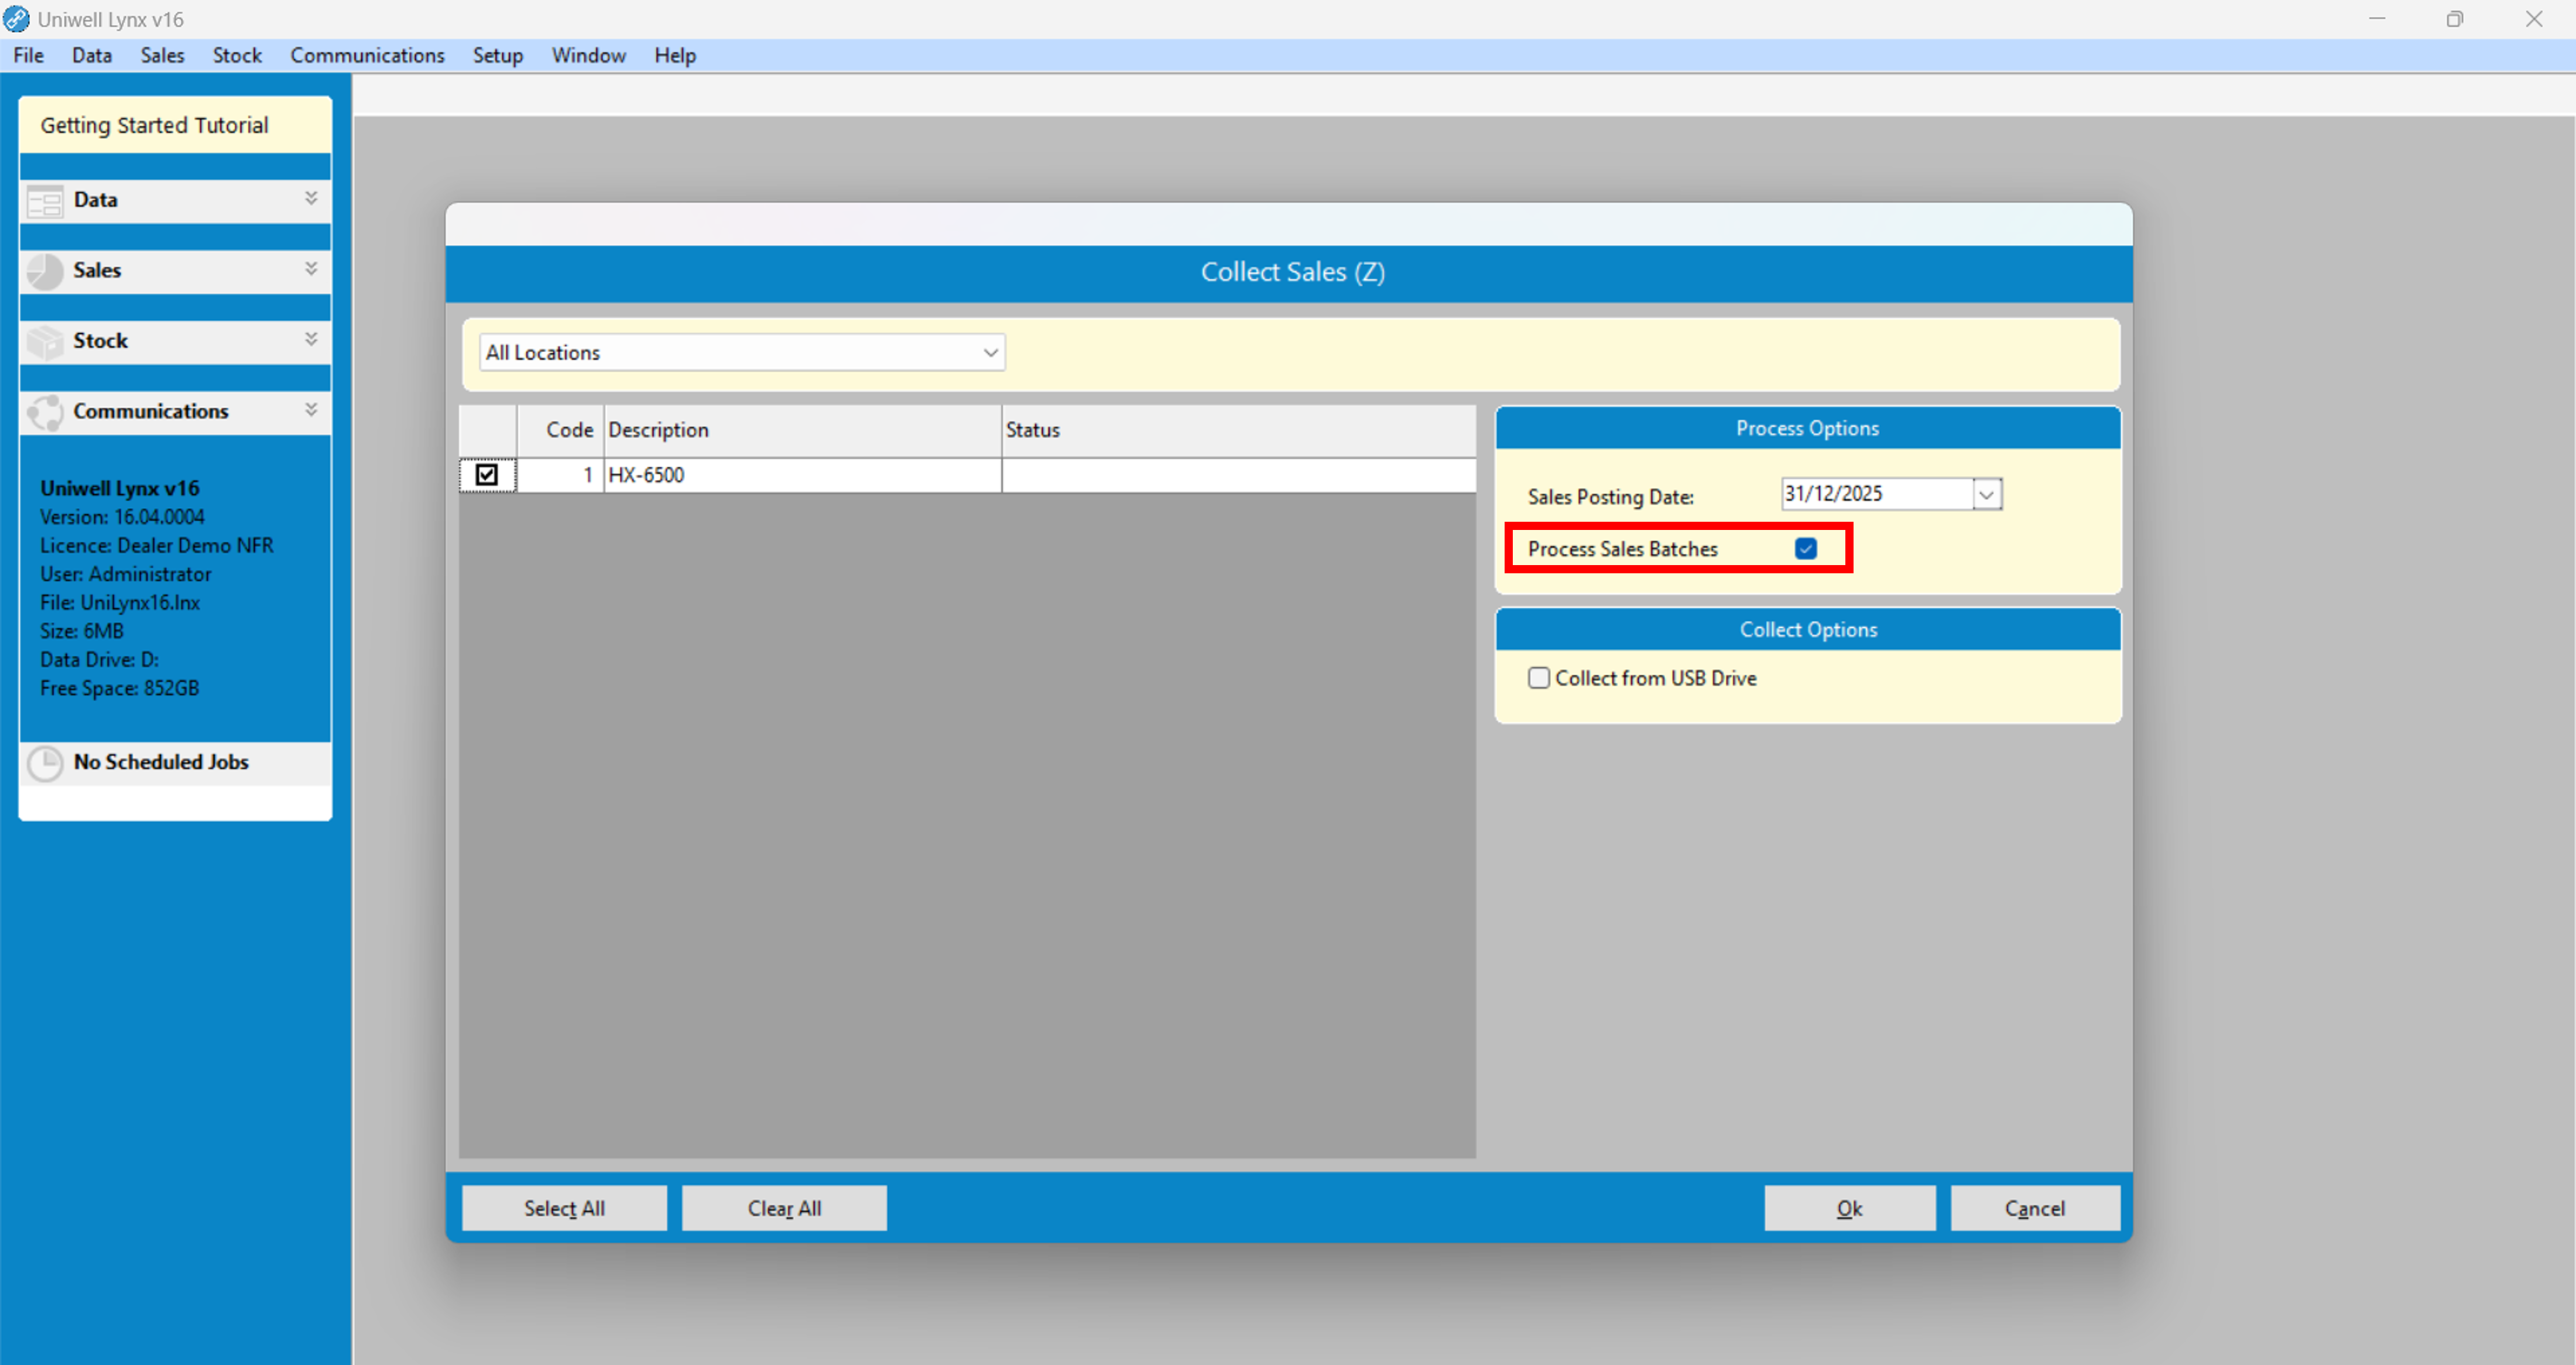
Communication Basics – Collect Sales
The Collect Sales option in the Communications menu is used to extract sales report data from your POS terminal. To perform a Collect Sales:
- Go to the Communications menu and select Collect Sales
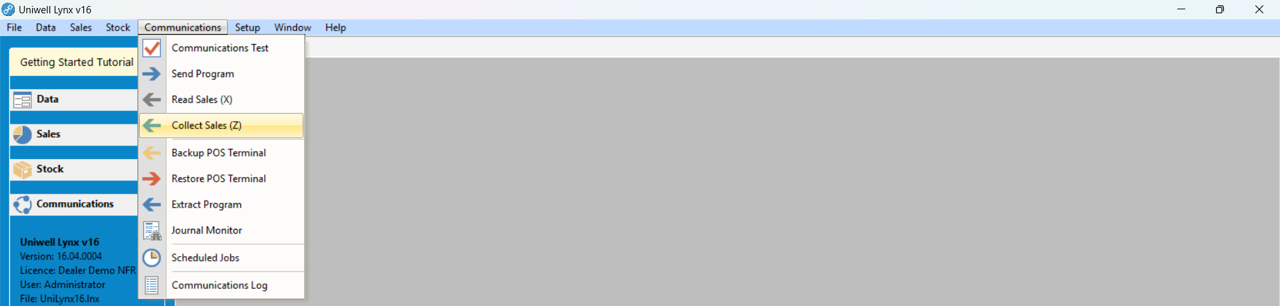
- Select the POS terminal/s you wish to collect sales data from
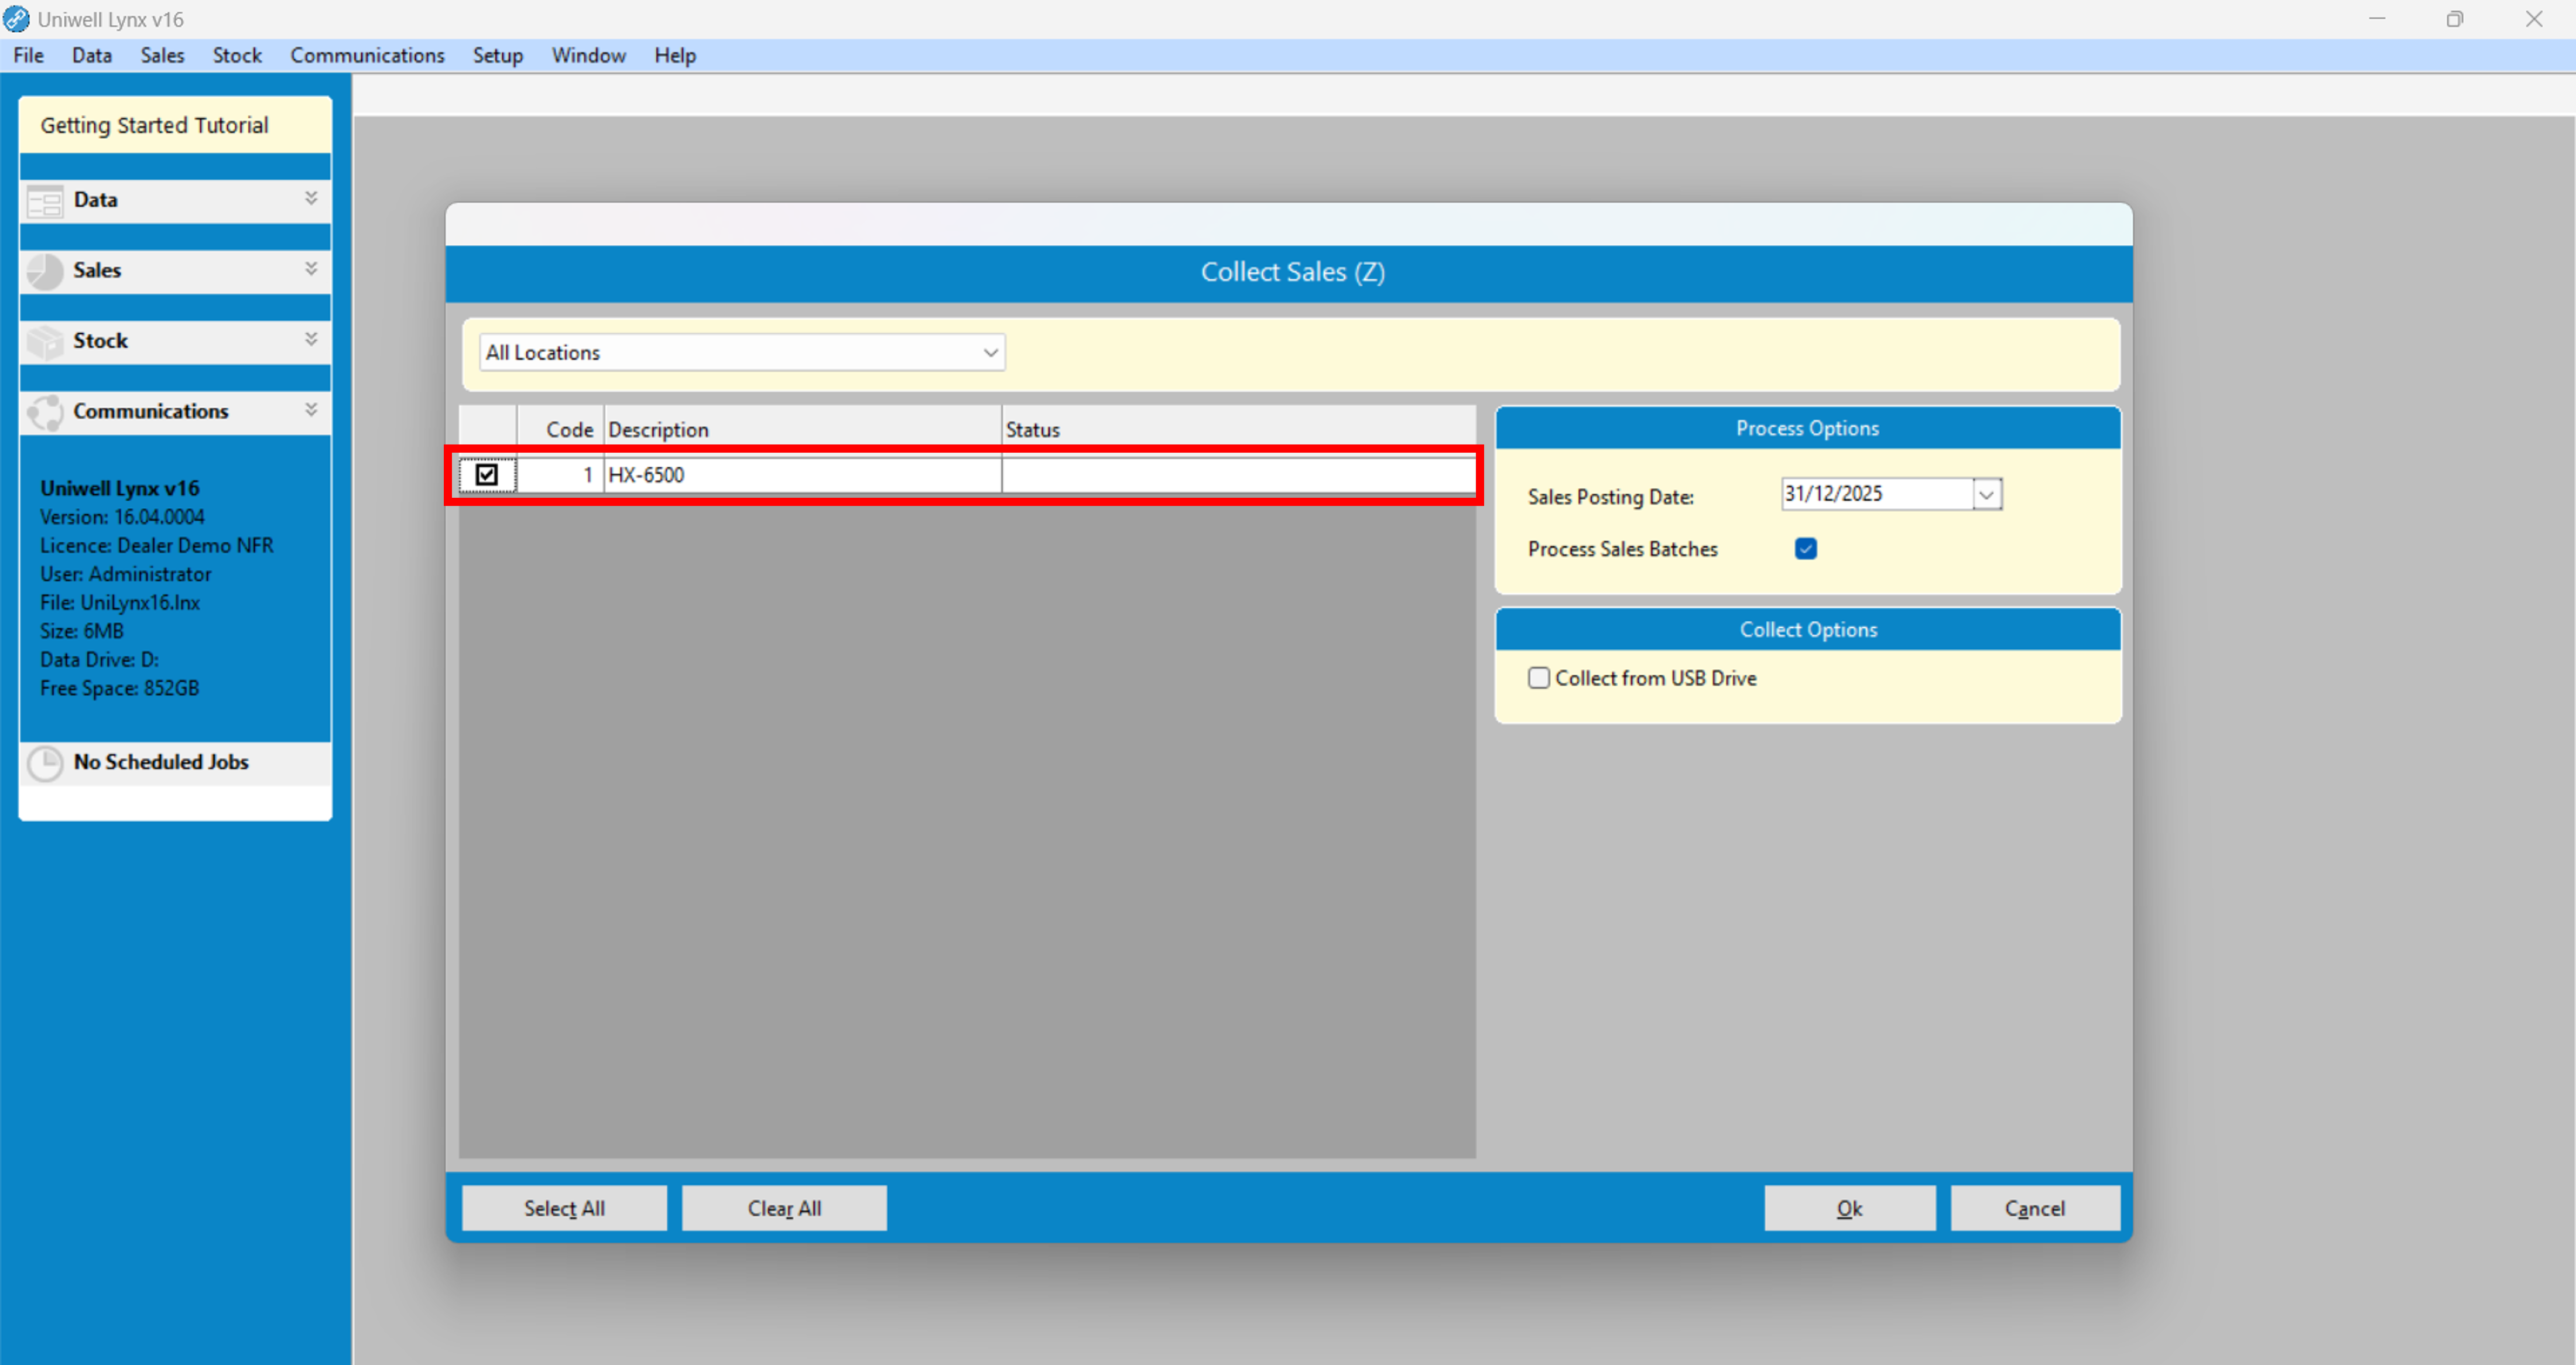
- Click the Ok button
Further Tutorial: Collect Sales and Sales Batches
Communication Basics – Sales Batches
An important concept to understand with regard to collecting sales is Sales Batches. Whenever sales are collected from a terminal a sales batch is created. This sales batch contains the reports that were extracted from the terminal. The data in a sales batch must be processed before it will appear on sales reports. Sales batches can be processed automatically during Collect Sales by ticking the Process Sales Batches checkbox.
Further Tutorial: Collect Sales and Sales Batches
Communication Basics – Sales Reports
Once sales have been collected and sales batches have been processed, you can view your Sales Reports. To do so, go to the Sales menu and select Sales Reports.

Further Tutorial: Configuring Reports
